I did it again or is it already again again? Sewing something that doesn’t fit. You my dearest readers will know this better than me, as I suppress every thought about my craft-fails – a very helpful method to stay motivated with sewing. I highly recommend it :-DDD
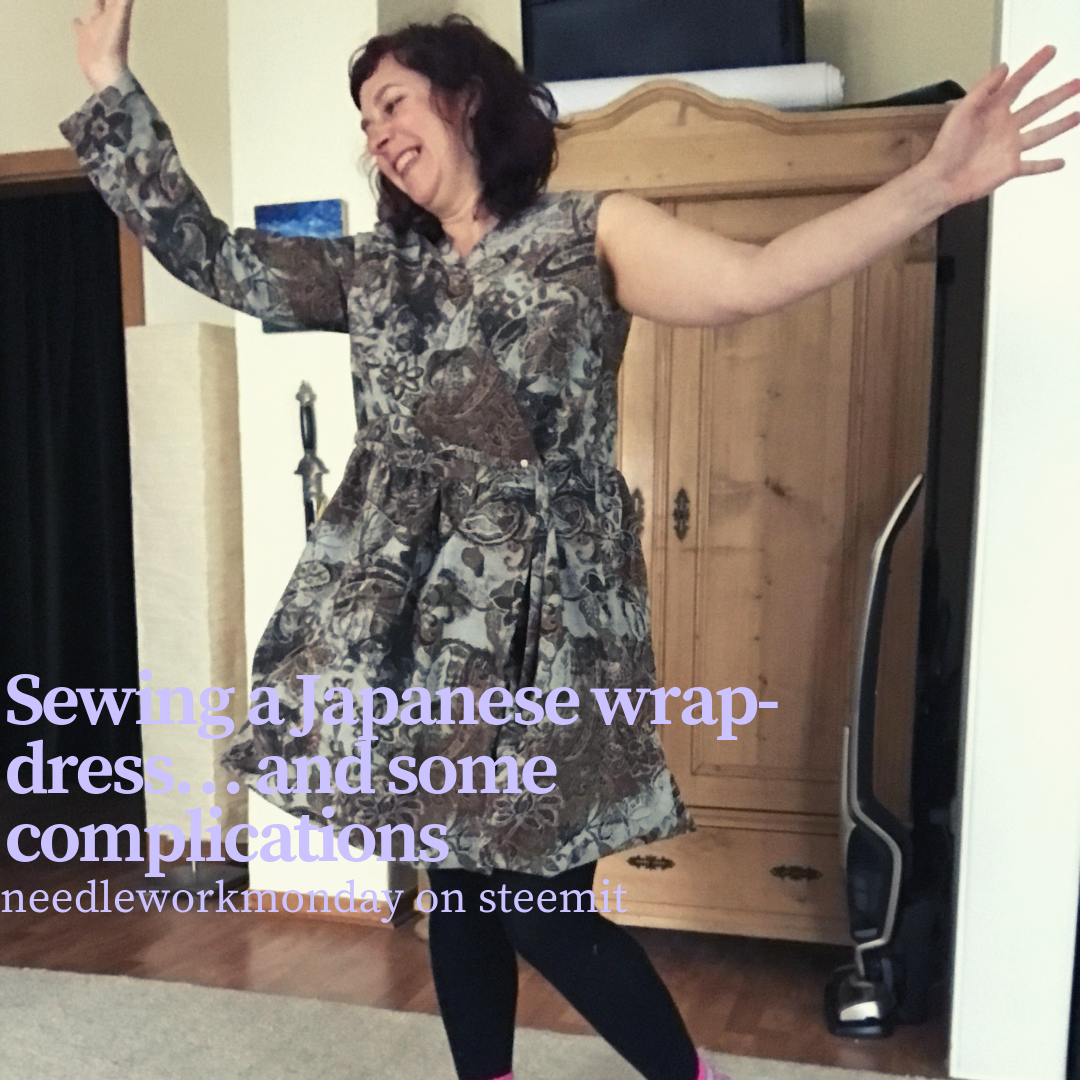
I have this lovely Japanese sewing book for many years now. It is the first sewing book I owned. Cleverly, I bought it before I could sew, so it slept for a while in my book shelf. Now as I am a bit more experienced in sewing (please stop… I can hear you snickering) I wanted to give it another try. I opened the book and – tadaaaa – the first pattern was so beautiful, that I wanted to try it: a wide wrap dress which can double as a coat. If you want a look at this pattern and the whole book here is a review in English.
You know my strategy. The first step is always to buy a inadequate cheap fabric, to try fit and pattern. The selection of bargain fabrics which were big enough to sew this coat-dress was very limited – except if you think a dress made from neon fur fabric – which is a remnant of carnival is a good choice… than your options are better. I chose a sturdy denim like fabric in powder blue with brownish ornaments. The fabric is very stiff and durable, but I thought this a good quality, as I thought of this project more as a coat than a dress. Yeahhhh…. And no, this wasn’t thought through. The dress has a wide gathered skirt piece which can stand on itself because of the stiff fabric.
.png)
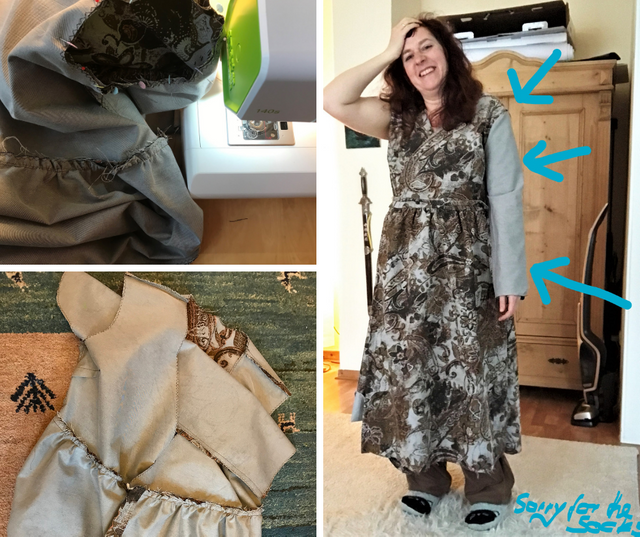
But two steps backwards. To trace the pattern was easy, the explanations about material and process understandable and so the body of the dress was finished in no time. The bust dart sits on the right place and the shoulders are ok. The armhole is a bit to narrow under my armpit, I would modify this, if I ever sew this again.
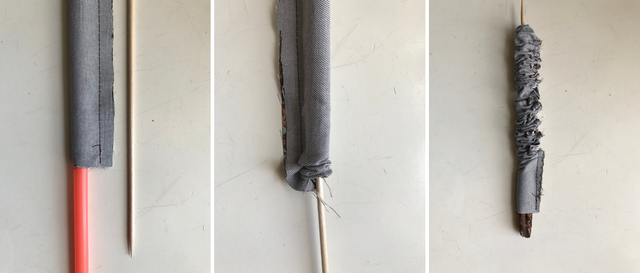
As a next step the book recommended to work the straps. And I nearly burned the whole thing while trying to follow the explanations. And believe me I read/heard/saw many of them. My fabric was so stiff, I couldn’t turn the d*** sh** inside out. I tried it with a safety pin, I used chopsticks, I jumped on it…. But the stubborn thing didn’t slip a millimetre. The method that finally worked (but nowhere near as good as in the video I watched) was to use a huge drinking straw and a wooden pin. You stick the drinking straw inside the strap and than poke with the wooden pin into it to. If my explanation is too elaborate (joke) just watch this video 😀 (you really do not need these fancy tools which are recommanded in the video, the drinking straw worked fine.
.png)
.png)
So, my dear needleworkes, what shall I do. My first notion was as ever, to burn unpick the whole dress and reuse the fabric for a real coat. But on a second thought, maybe I can wear the thingy if I simply shorten it? I made more of these informal photos where you can get a impression of the dress in a shorter version. But you need a bit of imagination as the fabric bulges so immensely, it looks like a ballon skirt.
.png)
Nevertheless, what do you recommend? Ripping or shortening?
PS: sorry for the uncurated and a bit weird photos with funny socks and trousers beneath my dress.
PPS: I cut my hair…. 😀