Last Monday on steemit I promised you a pattern, the pattern of a top-down crocheted baby jacket. And guess what, I do not find my notes anymore (that’s a lie: I found my notes, but they are horrendous incomplete and as if this wasn’t embarrassing enough, I cannot find my photos of the finished jacket. The photo in last Mondays post is before I finished the sleeves…aaaaahhhhhh)
So, I will now pretend that it is essential to talk about the different ways to construct a cardigan in general, before I will present you a pattern in the next weeks (hopefully).
It is essential to knitting or crocheting a cardigan to know which different methods there are to construct it, because eventually it is good to know your enemies (sewing!!!!). This is me making fun – naturally – because all methods have pros and cons (again a lie: I love top-down constructions and think all other methods are completely sh***)
The types of constructions are very similar in knitting and crochet, so if you understand the technique in one craft it is very easy to transfer it into another.
Perhaps the best known and mostly used method of constructing a cardigan is working from the bottom up in separate parts.
So, this week’s theme is:
The seamed cardigan
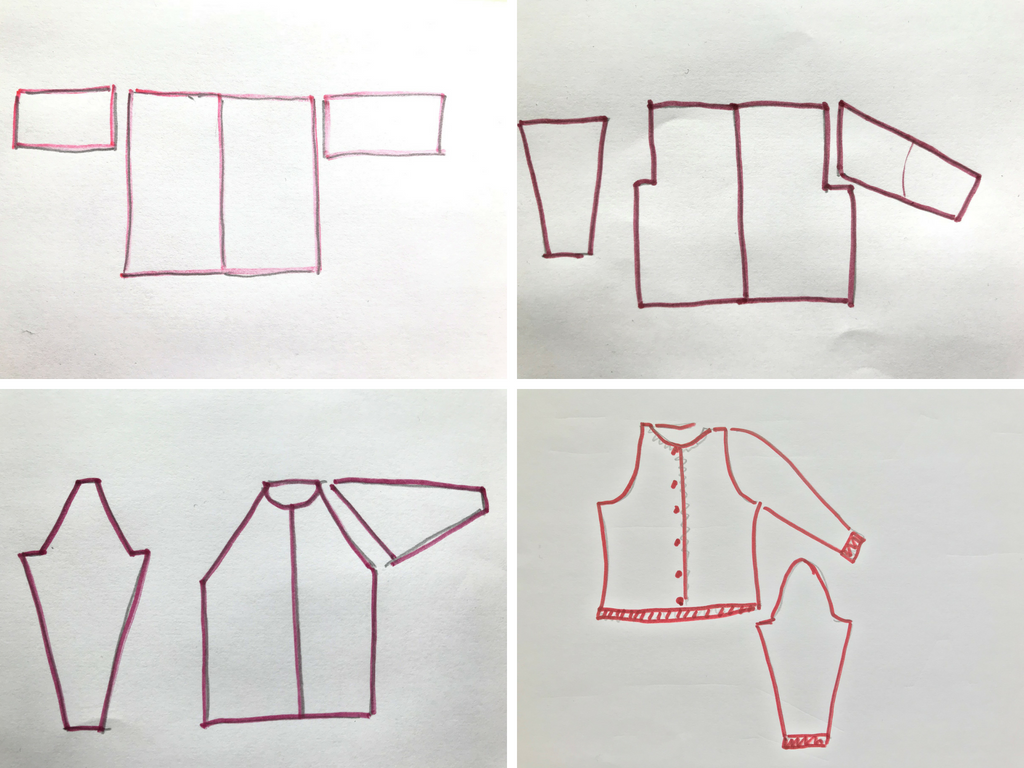
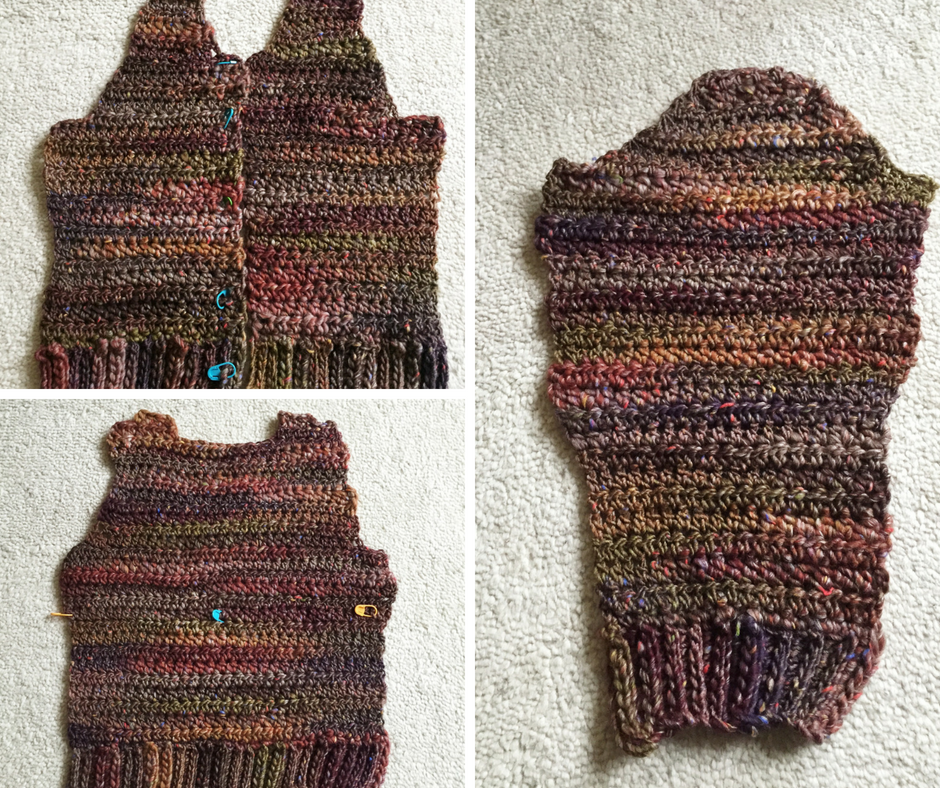 The construction of this cardigan is the same as in a sewed cardigan where you cut the pieces out of fabric. In knitting or crochet you separately work the back, the two fronts and the sleeves and then sew them together (gag). Button-band and neckline are afterwards picked up and completed.
There are some variations at how to work the sleeves; e.g. you could make raglan sleeves or set-in sleeves, you could work sleeves with dropped shoulders or with shaped sleeve-caps. So, one of the pros is apparent: you have more control over the fit of the shoulder. Another pro is, that the project is easier to transport, because it consists of separate parts which are small enough to put them in a little bag.
A big con is the sewing part…. Not only do I dislike sewing by hand, furthermore you only know if the cardigan fits, after all parts are finished and pinned together. And it is always a nice surprise to put the finished cardigan on and notice that the back is much too big and the sleeves to tight (you know I have a history of knitting things which do not fit :-D) But this con includes a pro – confusing I know – because if the cardigan consisting of separate parts, it is much easier to change the fit after you are finished. You can insert gussets in the too narrow sleeves or cut/unravel a section of the too big back. With a top-down construction you are more or less stuck with the thing you made, changing the fit afterwards is very limited.
Another pro for the seamed cardigan is that it has more structure. The seams are like the beams of a house, they prevent that everything slumps down (ok a top-down cardigan will not decompose after a while nor unravel, but it can happen that the weight of the yarn stretch the raglan increases and the cardigan looses it fit)
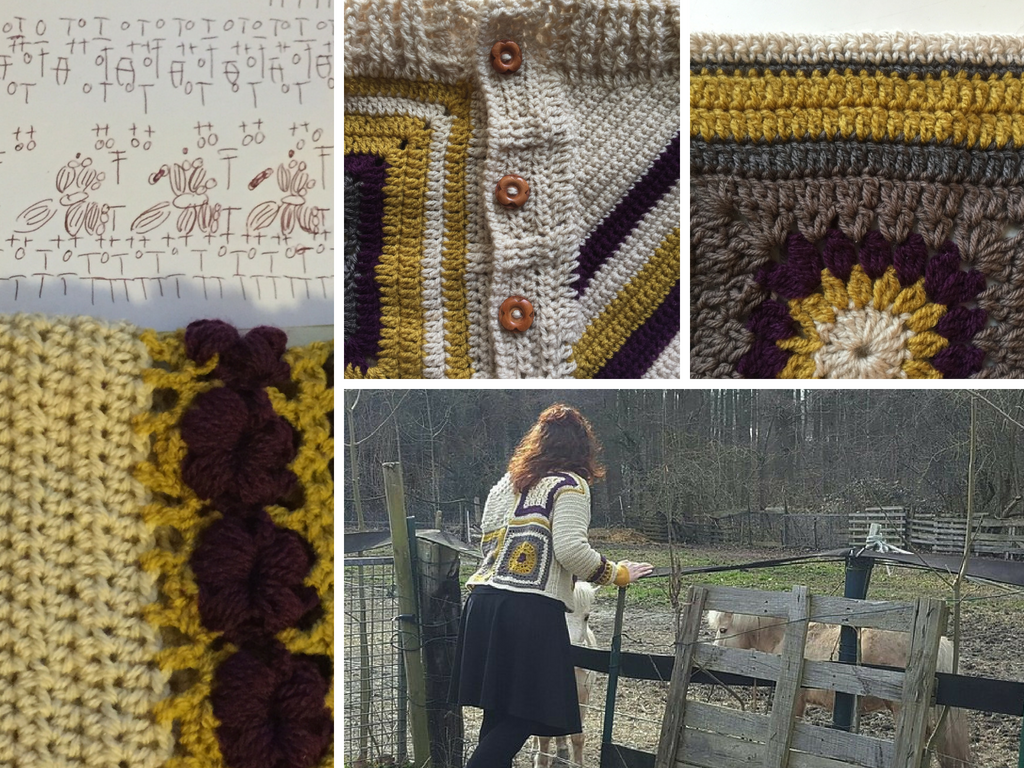 A beautiful variation of the seamed cardigan is to make it out of geometric forms. This is especially nice with crochet. You can form the entire cardigan out of several granny squares or circles or hexagons. This will lead to even more sewing, but I think the beautiful result justifies the extra work. (yes, you guessed right, this is another lie…. I only once crocheted a cardigan out of granny squares and I hated every minute of the sewing process. I hated it so much, that I decided to make the sleeves out of half double crochet instead of more granny squares).
Skills needed
There might be another pro to the seamed cardigan (which I do not like to admit, because after this post I must reconsider if my beloved top-down construction is really the best method). This kind of construction is very beginner friendly. You can decide to make the whole cardigan out of rectangles. The fit will not be perfect and especially the neckline will be a bit strange, but it is possible. As you can see on the sketch you will need two rectangles for the fronts, one for the back and two for the sleeves. There are no increases or decreases necessary. You can work the whole cardigan in one stitch pattern, with crochet maybe in half double crochet or double crochet and in knitting in stockinette or garter stitch.
If you want a better fitting cardigan you need to learn how to increase and decrease stitches to shape the armhole, the neckline, the sleeves and perhaps the waist.
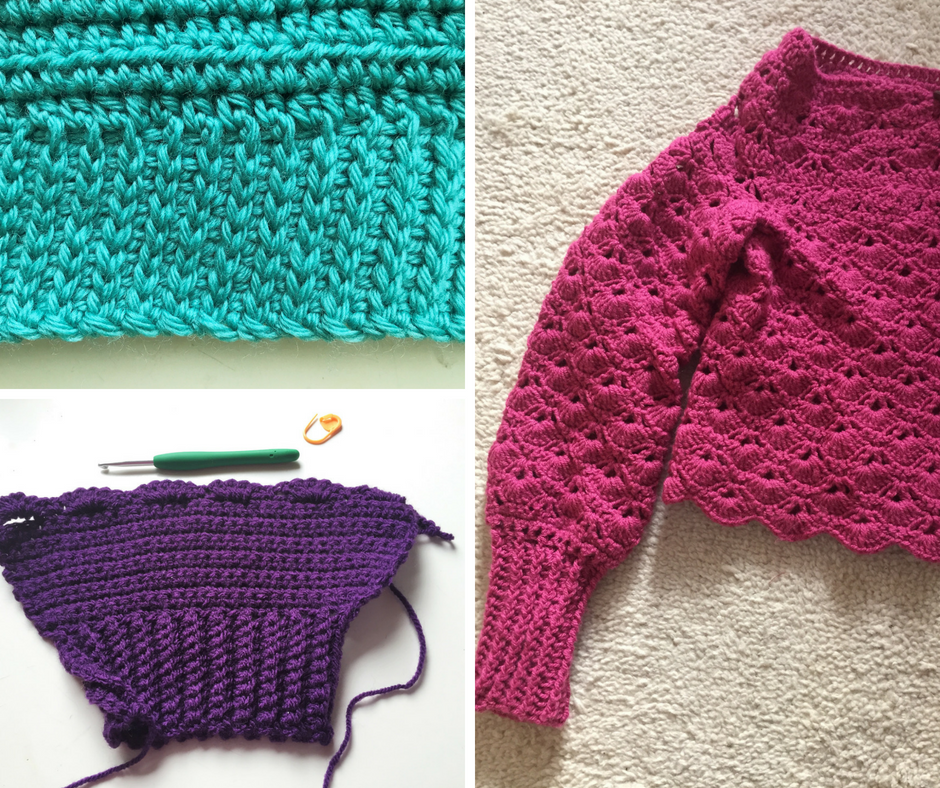 And if you want a good fitting professional looking perfect hell of a cardigan, you should consider learning a stitch pattern to form the ribbing of neckline, button-band and cuffs. In knitting this can be done very easy, because the simplest ribbing consists out of alternated knit and purl stitches (although there are much more elaborated methods). In crochet it is tad more complicated. Here you can work the ribbing out of front and back post stitches or you can make a ribbing with slip stitches (but this kind of ribbing must be worked in a different direction than the rest of the cardigan).
If you have managed to do this, then the possibilities are endless: Puff stiches, flowers, colour work… or you can make a cropped cardigan, a long and flowy coat, a short-sleeved cardigan, or a cardigan with bell sleeves and so on….
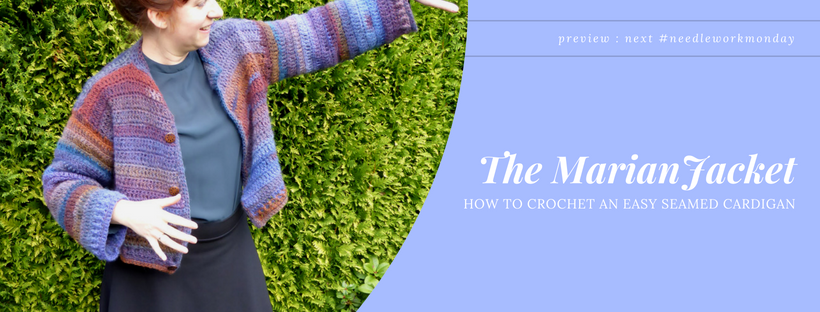 Next week I will present you a pattern for a seamed crochet cardigan, where you can try out if you like this method of construction. After this I will explain roughly three (for me more unusual) techniques to knit or crochet a sweater: the top-down with set in sleeves, the bottom-up with a round yoke and the sideways worked cardigan. Hopefully I worked myself up to week three with my beloved top-down construction which I will present much more detailed and hopefully with the pattern for the grey baby cardigan.