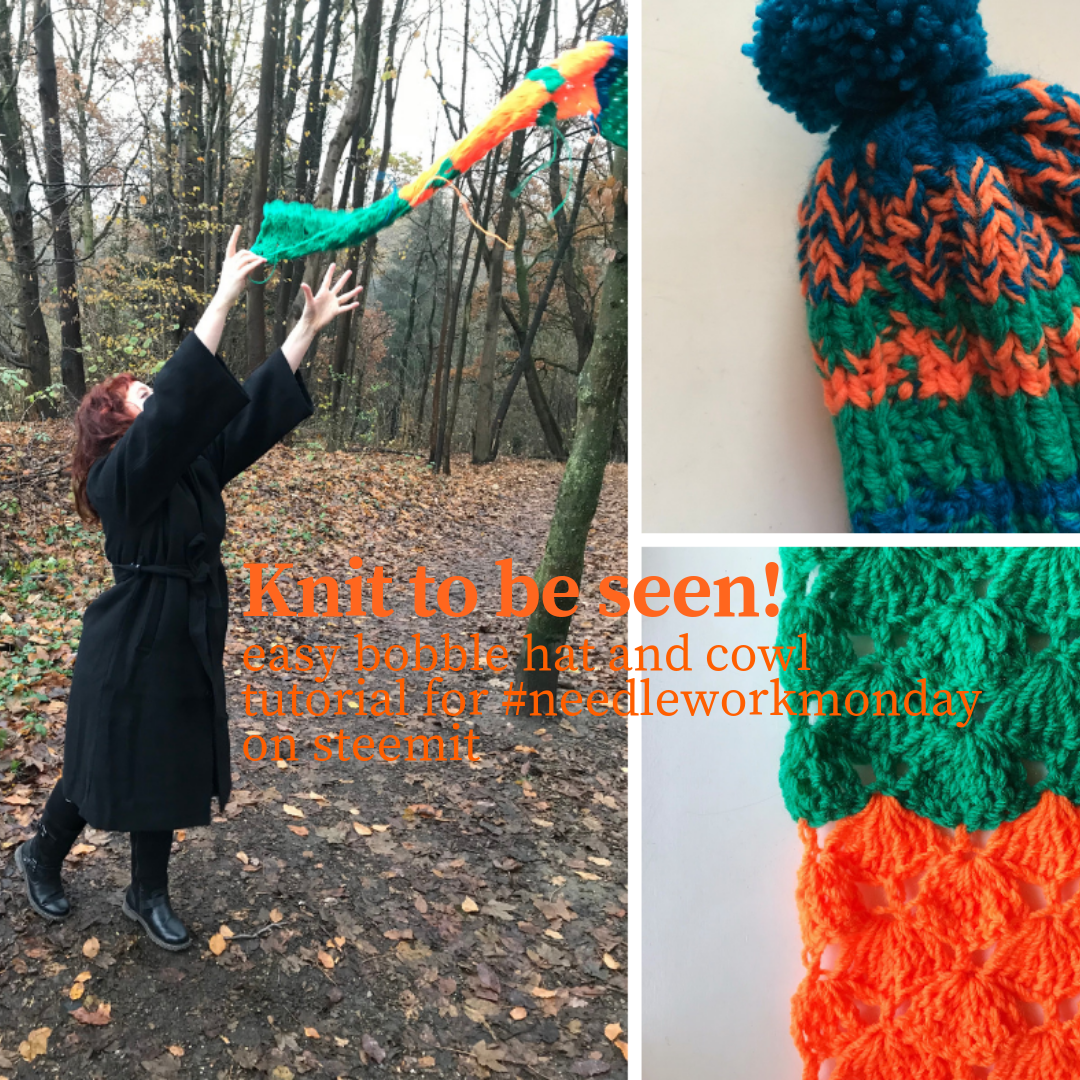
I am an attention seeker. I want fame and honour. An applauding audience at every step I make. I want to be seen in my glorious beauty (by now you perhaps notice the irony). No pedestrian nor driver should pass me without admiring my outfit (yes @cryptocariad I remember your comment ) and with these colours even in the dark there will be no perception problems.
May I present the #blindingvomit bobble hat and matching cowl
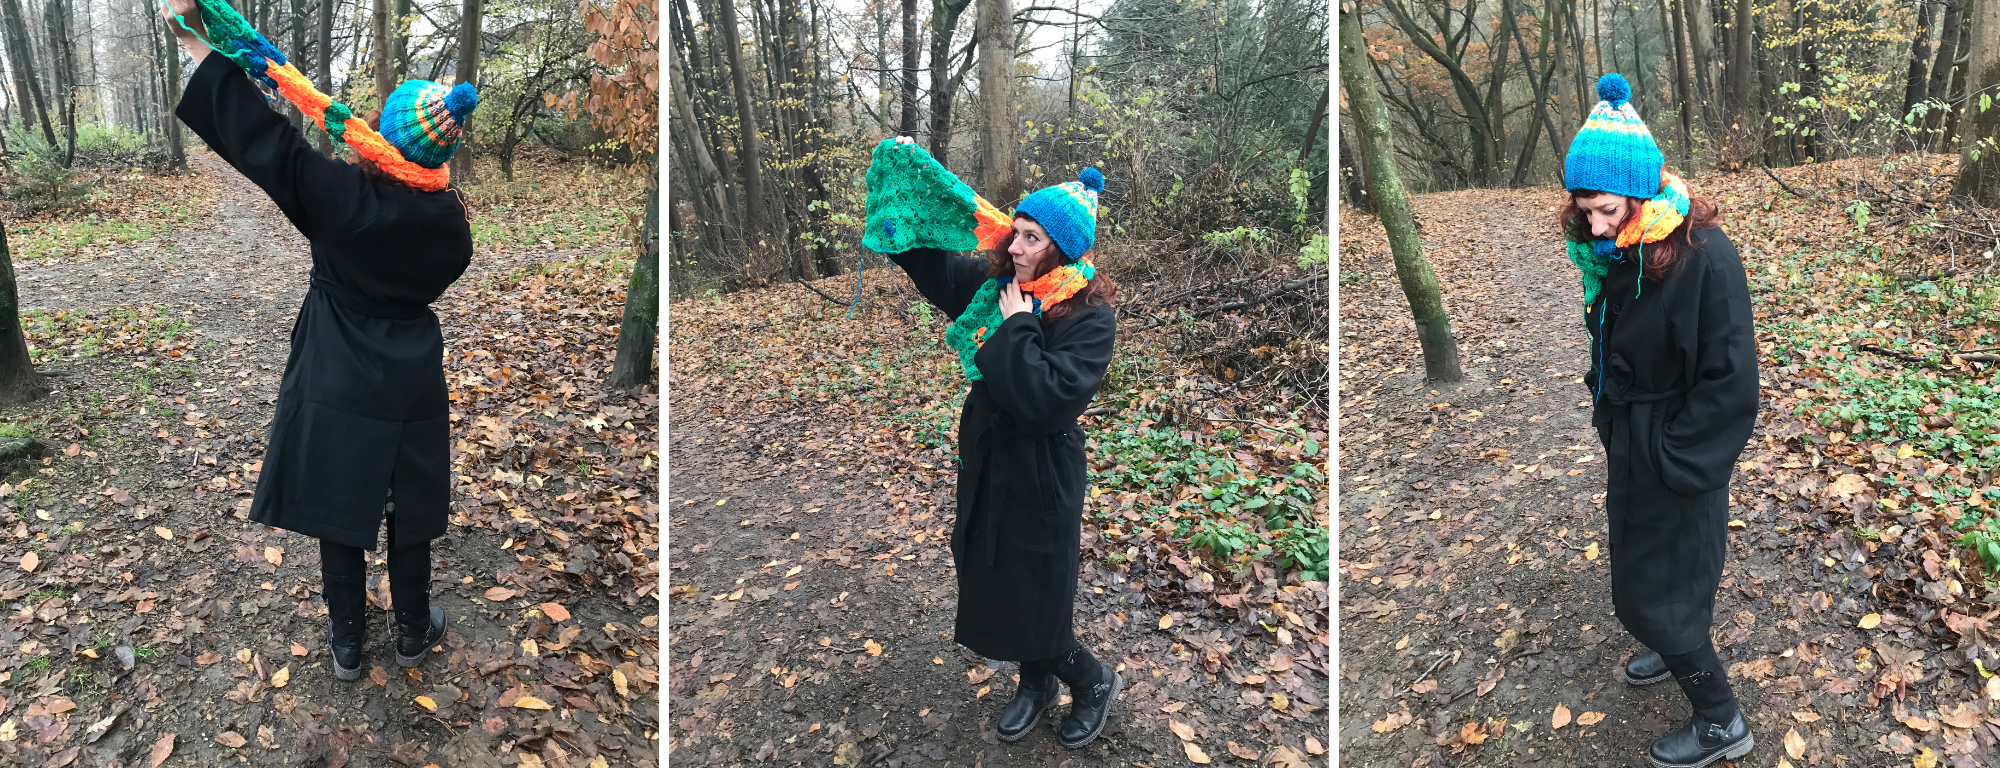
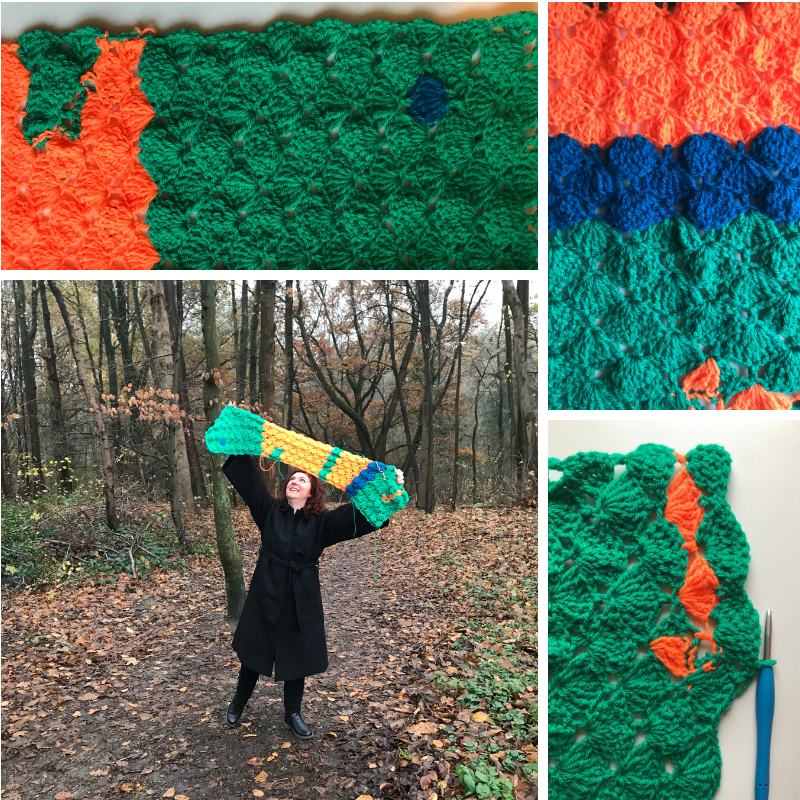
Look how every color fights its neighbour, how the orange glows like nuclear fuel rods, how the green matches the saliva of zombies: perfect. To pretend that I created a high fashion outfit, I modelled it without the yarn-ends sewn in and, yes, finally with a new winter coat, which I needed for two years now.
I can imagine everyone wants a hat/cowl combination which makes her skin crawl. So, I decided to make a rough knit (and crochet) with me, a kind of half-hearted tutorial 😀
.png)
The Bobble Hat
As I am a combination knitter, it is more convenient for me to knit ribbing flat. If you prefer a different style of knitting, you can knit the whole thing in the round. Also keep in mind that I knit very loose, so you maybe need to go up with the needle size.
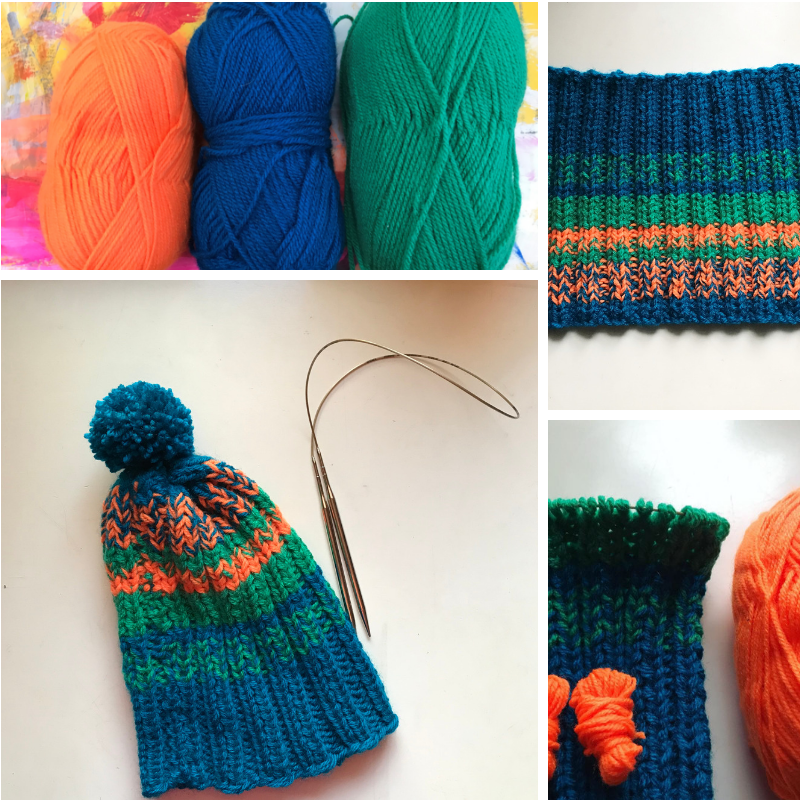
Materials
I used three different acrylic scraps I had in my stash. They do not have the same weight and meterage.
Blue and green: 100 g / 241 m
Orange: 50g / 199m
When using the thicker yarn, I held it double, the thinner one triple. This not only leads to a thick and warm fabric, it also allows to mix the colors into dazzling combinations.
Needle 6,00 mm
My hat is 24 cm long (without pompom) and 14 cm wide (unstretched, and it is super stretchy)
.png)
I started with the long tail cast on with 52 stitches. To estimate the length of yarn you need for the tail, wrap the yarn around your needle 52 times (or the amount of stitches you use) and then add a bit of length to be safe.
Row 1: the ribbing set up, purl two, knit two and repeat this to the end of the row.
Row 2: every knit stitch is knitted, and every purl stitch is purled.
It looks cooler if I write it down in the knitter’s abbreviations language 😀
R1: * P2, K2 *
R2: *K2, P2 *
These two rows are now repeated to the desired hat height. I knitted 44 rows
If the fabric is big enough, you cast of in pattern.
Now you have a rectangular piece of knitted ribbing lying in front of you and you will form it into a hat by a bit of sewing. First you seam it into a tube by sewing the long sides together. Now put this tube on you head and decide which side better harmonizes with you face (if you followed my color scheme, there will be no harmony :-DDD) and sew the other side together. Do not cut the yarn, but pull it vigorously, so that the seam becomes smaller and the hat is formed. The top of the hat now has a slightly folded/crumbled outlook. And on this peak you will sew on a pompom. Done!
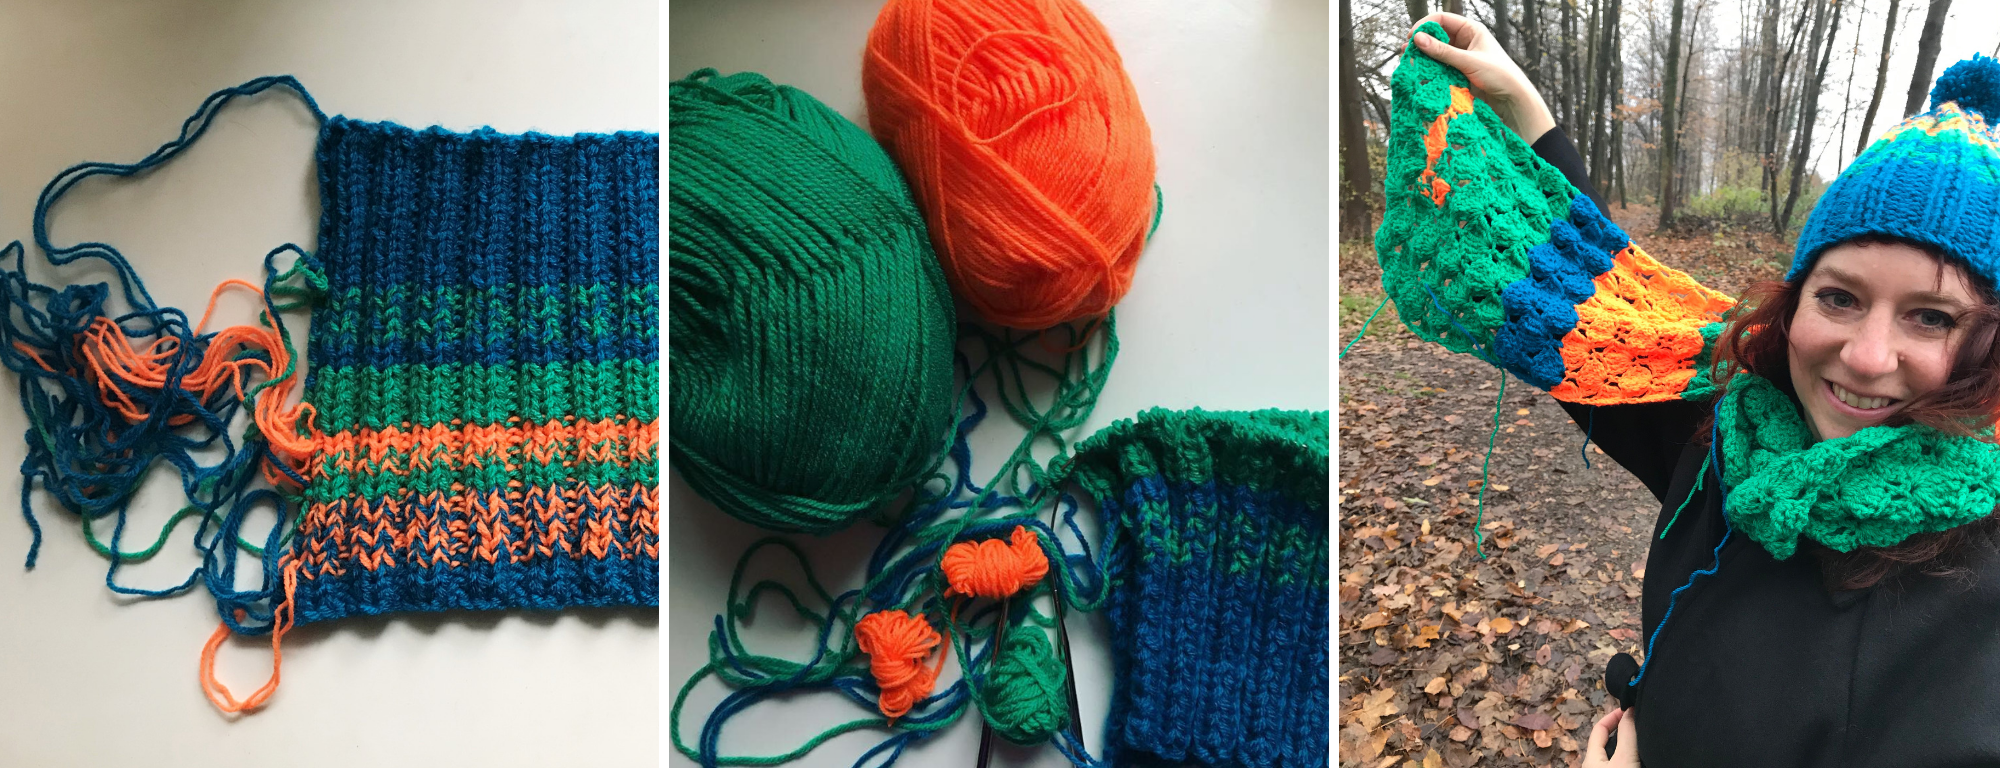
Oh wait… I may have omitted the yarn-ends… and yes, there will be plenty of yarn-ends to sew in. Sorry.
.png)
The matching crochet cowl
First, I must clarify: the cowl on the photos is not finished (yes, I know, you already guessed this) But I wanted to write this post today and needed the money photos. So, you only get to see an unfinished shawl 😀
Nevertheless, that’s what I have done (ahem – I am doing)
I used the same yarn as for the hat, but I used only one strand of it at the same time. So, the cowl is slightly smaller in the parts of thinner yarn. As a hook I used 5,00 mm. Remember… loose crochet on my side, I don’t know your side, perhaps you need a bigger hook size.
My cowl is 28 cm wide and 120 cm long (and I will sew it into a tube)
The pattern I used is a large shell stitch which needs a multiple of 8 plus 5 stitches. The pattern you crochet is for every row the same, it is only shifted. My cowl is 37 stitches wide and consists of 57 rows. I used US crochet terms.
Row 1: 3 treble into 5th chain from hook, * skip the next three chains, 1 double crochet into next chain, then skip 3 chains, 7 treble into next chain, * repeat from * to * to the last stitches 4 chains, skip 3 chains, 1 double crochet in last chain.
Row 2: chain 4, 3 tr in first dc, * skip 3 stitches, 1 dc in next tr, skip 3 stitches, 7 tr in next dc, * end with a dc in the 4th chain of the previous row.
Repeat row 2 as often as you like (or as you have scrap yarn)
.png)
To make the cowl or shawl super special, I not only worked it striped but tried to work some of the shells in different colors. I achieved this by surface crochet. I simply crocheted to the place where I want to insert a fleck of color and used a new yarn. But I did not connect the old and the new yarn, but, let the loop of the old one alive. When I am finished with my new color I go back and bring the old color via surface crochet to the place where it is needed. This works better with the darker colors as you can see on the photos, as the surface crochet is less visible than with the orange.
Fasten off, sew in all yarn ends and sew the shawl into a ring, to make it a cowl. Or don’t 😀
If you want to see more beautiful projects with yarn, fabric and most of all needles, follow @needleworkmonday on steemit. Or even better grab your needles and keyboard and join the #needleworkmonday community. If you want to read all the comments to this post visit my steemit blog.