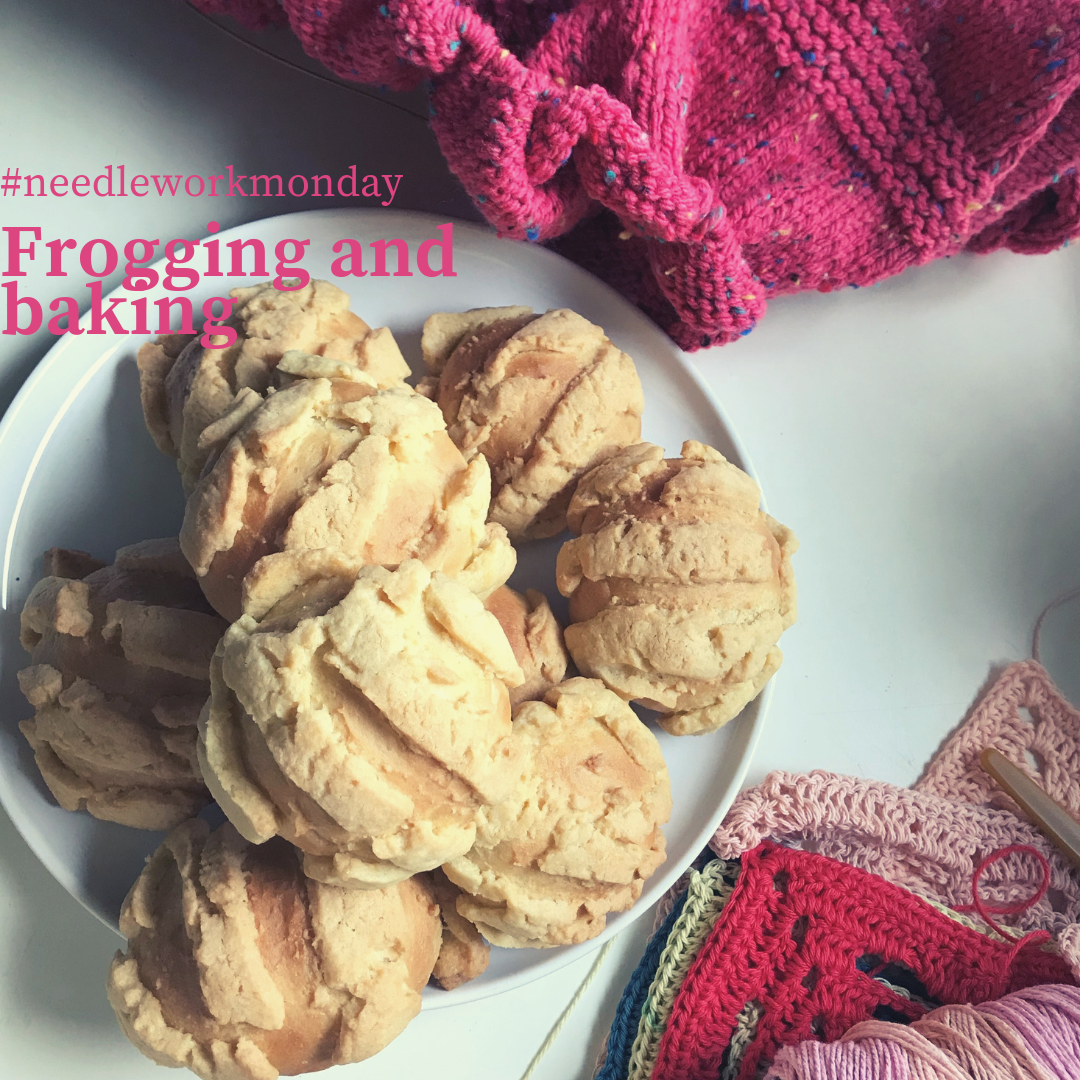
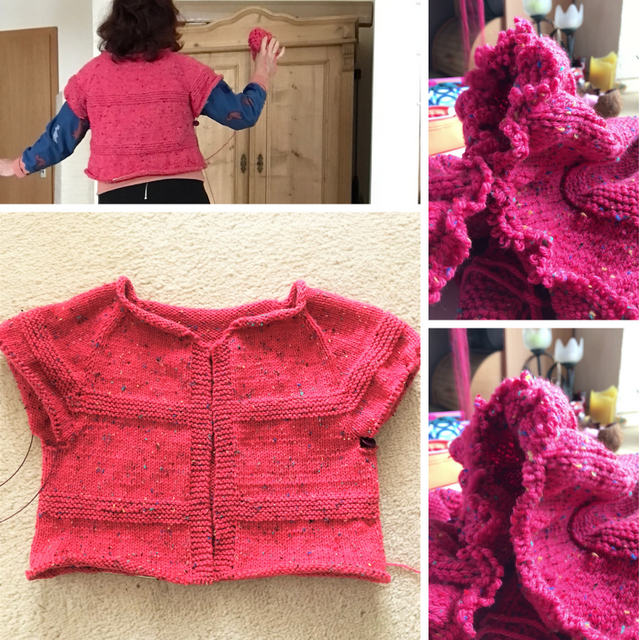
Last week I proudly presented you my Fake Frankie cardigan. An easy top-down raglan cardigan with a simple pattern of garter stitch rows on stockinette background. Last week I may have bragged how experienced I am in knitting (and crocheting) such top-down constructions. This week I frogged the Fake Frankie cardigan…
No, don’t be afraid, not the whole cardigan, only the last rows of the cardigan’s body. You remember the photos of last week (if not here there are again).
.png)
After writing and posting last Monday I contemplated them again and after some minutes I was convinced that the cardigan is long enough. I immediately started the last garter stitch section which replaces the ribbing in this cardigan. I knitted 8 rows, put the cardigan down and was so pleased that I would be finished in two more rows (the garter stitch sections are 10 rows each). And then I noticed that I completely ignored the distance between the garter stitch part and the stockinette part – the last stockinette section was much to small…. Ahhhhhh…..
And there we are now. At the unraveling part. Which I hate, because I am a chicken which is frightened to drop stitches during the unraveling process. Therefore I made a foolproof plan to tackle this dangerous process of unraveling:
First: Bake something sweet
Second: eat enough sugar to create a high which then will carry me through the ..
Three: frogging
Thought and done
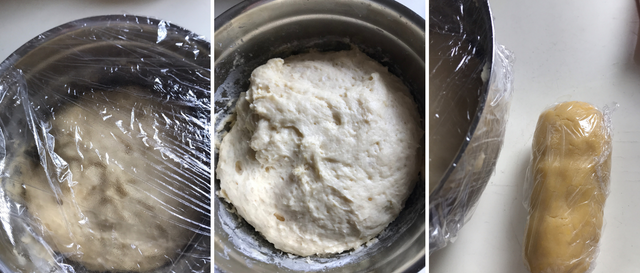
As I had a block of yeast resting in my fridge and the bread bin was empty I decided to bake two birds with one stone – or so :-DDD I remembered a wonderful Japanese recipe I got from a friend which were the perfect solution – Melonpan. Sweet and fluffy yeast rolls covered by shortcrust. I doubled the yeast dough recipe to not only bake the cute Melonpan, but also a small yeast bread.
.png)
For the bread/roll dough I sifted
400 g wheat flour
into a bowl with 6 g of salt.
In another bowl I combined
20 g fresh yeast
1 big egg
30 g sugar
100 g milk (38° C)
100 g water (38° C)
30 g soft butter
Now I combined the wet ingredients with the flour and mixed them into a soft dough. I covered the dough and let it rise for approximately 1 hour. During this rising time, I prepared the shortcrust. I mixed:
50 g cold butter
55 g sugar
120 g wheat flour
1/3 Tsp baking powder
Dash of salt
into a dough which I rolled into a sausage form. I covered this dough and put it into the fridge. (Making the shortcrust is easy, not eating the whole dough, this is the hard part)
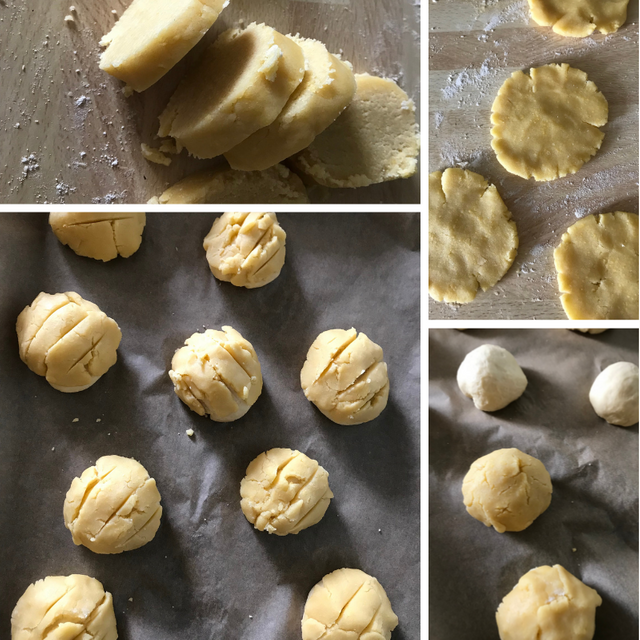
One hour later my yeast dough had roughly doubled in volume and was ready to be beaten down – ahem – flattened softly. I halved the dough to use one part for the Melonpan and the other half for the later bread. This part I put away to let it rise till I would use it.
.png)
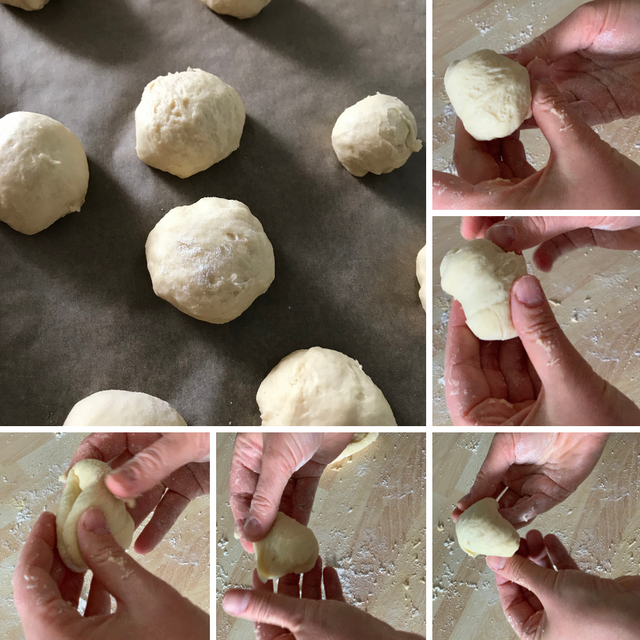
For the Melonpan I divided the yeast dough into 8 small parts which I first stretched and then formed into balls. Now on to the shortcrust. This I cleverly divided also into 8 parts 😀 and rolled it out into thin disks (actually I could not find my rolling pin, so I flattened the dough by hand which was not aesthetically pleasing). I stretched the yeast dough a second time and again formed small balls which I covered 2/3 parts with the shortcrust.
.png)
After all Melonpans are placed on the baking sheet I cut diagonally into them to form their typical crust pattern. I let them rise for 15 minutes and then they hopped into the oven for 6 minutes on 200 degrees and then 10 more minutes on 170 degrees.
.png)
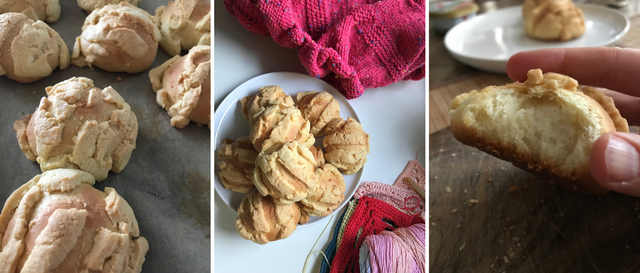
Tada: my sugar doping was ready ??? Thy looked like crumbling misshapen mutant rolls, but the taste …. Yummy ? ?
As the oven was still hot I also baked the second part of the yeast dough (which I had stretched and formed), so we had not only sweets but some kind of bread for the next day 😀
Strengthened by the Melonpan I applied myself to the unraveling. To avoid trouble I mostly use one special method for frogging. By inserting a knitting needle into the first leg of every stitch of the row to which I want to unravel, I spare me the picking up of live stitches. As I am to lazy to explain, I made this short video:
how to unravel fearlessly
As you can see on the video, I was able to unravel without bigger
problems, I only messed up two stitches at the beginning of the row
where I placed the needle into the wrong leg of the stitches. After this
baking and unraveling session I am now back on track and again short
before finishing the body of the sweater (hopefully).
The other project I am on is a crochet bunting made out of Lisa Pinenote‘s dragonfly granny square. You can find the pattern on Ravelry for free if you want to join in.
.png)
Last but not least, I want to direct you to @needleworkmonday‘s contest. The #needleworkmonday community is celebrating its 2.!!!! Birthday this July (wooooooooow) and invites us all to create a special project which involves this celebration till July 29th. You can read more in this post. Hope to see you on the birthday party
Thank you @crosheille for iniciating and @muscara, @shanibeer, @marblely for hosting the #needleworkmonday. If you want to see more beautiful projects with yarn, fabric and most of all needles, follow @needleworkmonday on steemit. Or even better grab your needles and keyboard and join the #needleworkmonday community. You can read more comments on this post on my steemit blog.